Showing posts with label Main Dishes. Show all posts

Saturday, March 29, 2014

Low Sodium Slow Cooker Steak and Black Bean Chili

I'm sorry for not having a picture of this delicious low sodium version of steak and black bean chili. It was consumed before I had a chance to take a pic. I will update this post with a picture when I make this again.

Ingredients: 
  • 2 lb beef top round steak (I used a New York Strip Steak) 
  • 1 tbsp dried minced onion
  • 1 cup low sodium beef broth
  • 1/2 tsp onion powder
  • 1/8 tsp ground black pepper
  • 1/8 tsp paprika
  • 3 teaspoons chili powder
  • 1 teaspoon ground cumin
  • 1 lb dried black beans, reconstituted (prepared to package directions) 
  • 1 can (28 oz) no salt added diced tomatoes, undrained
  • 2 cans (8 oz) no salt added tomato sauce
  • 1 can (4.5 oz) chopped green chiles, undrained
  • 16 oz frozen corn
  • 1 sweet onion, diced
Directions:
  1. Prepare dried black beans to package directions.
  2. Cut steak into 1 inch cubes, trimming off excess fat.
  3. Mix all ingredients in crock pot.
  4. Cook on low for 8 to 10 hrs.
  5. Top with cheese and/our cream as desired.
Inspired from: http://www.bettycrocker.com/recipes/slow-cooker-steak-and-black-bean-chili/


Like what your reading? Share it!

Monday, July 8, 2013

Spicy-Sweet Grilled Salmon

So this was another recipe I tried that to me did not fit it's original description. Awesome - yes; spicy/sweet -  not so much. It was full of flavor and I might even go to say, the best salmon I've ever had. It wasn't dried out and a great balance of tang and sweet from vinegar/soy sauce/lemon juice/cilantro to brown sugar. Maybe if I added more red pepper flakes it would have qualified for spicy, but definitely not fixing the recipe as is. This recipe was originally made for broiling, but with the weather so nice outside, it was impossible for me to deny the grill this pleasure. Grilled salmon to me always has such a wonderful flavor. It has been a very long while since I have grilled salmon, so I was excited to break out my grilling skillet - it really is worth the purchase. The original title described this as "glazed". I'm sure since the heat source is on the bottom of the fish for grilling vs the top for broiling, that would contribute to it not really turning out "glazed". My feelings were not hurt that it didn't turn out that way because it was so delicious anyways!
 
Ingredients:
  • 1 1/2 pounds fresh salmon fillet with skin removed 
  • 1/4 cup red wine vinegar 
  • 1/4 cup olive oil 
  • 1/4 cup reduced sodium soy sauce 
  • 1/4 cup water 
  • 1 tablespoon lemon juice 
  • 1/2 teaspoon red pepper flakes, or to taste 
  • 1 teaspoon onion powder 
  • 1 teaspoon garlic powder 
  • 2 teaspoons chopped fresh cilantro 
  • 1/3 cup brown sugar, packed 
  • salt and ground black pepper to taste
Directions:

  1. Place salmon in a gallon sized Ziploc bag. 
  2. Combine the vinegar, olive oil, soy sauce, water, lemon juice, red pepper flakes, onion powder, garlic powder, cilantro, and brown sugar in a blender (I used my stick blender). 
  3. Blend until brown sugar dissolves. 
  4. Pour the marinade over the salmon to cover evenly. 
  5. Seal the bag and refrigerate at least 2 hours (laying the salmon flat).
  6. To grill: If you have one of those grilling skillets, this makes grilling fish a lot easier. Lightly grease skillet (and grill) with cooking spray or canola oil (it makes removing the fish and cleaning the grill a lot easier if it doesn't stick). 
  7. Place fish in skillet. Keep the marinade to baste with in a few minutes.
  8. Salt and pepper to taste. 
  9. Grill for 15-25 minutes (depending on the thickness of the fish). No flipping required! Baste every 3-5 minutes with marinade to keep fish moist.Grill until salmon is done - when fish is no longer bright red and can be flaked with a fork. 
Broiling Directions:
  • Broiling is also an option. Here are the directions from the original recipe for broiling and making the sauce from the remaining marinade. I decided to forgo the sauce. The fish was plenty moist and flavorful by itself.  
  1. Line a broiling pan with foil. 
  2. Remove salmon from marinade, and place on prepared broiling pan; season to taste with salt and pepper. 
  3. Transfer remaining marinade to a saucepan. 
  4. Turn on broiler to low. 
  5. Broil salmon about 6 inches from the heat for 5 minutes; brush with remaining marinade. Broil an additional 5 to 10 minutes, brushing 2 or 3 more times with additional marinade. 
  6. Meanwhile, cook the remaining marinade over low heat until it thickens and reduces by one-third, 5 to 10 minutes. Use cooked marinade as a dipping sauce or drizzle over salmon just before serving.


Like what your reading? Share it!

Sunday, October 7, 2012

Mint Honey Lamb Skewers - Grilled!


These tasty lamb skewers were my first experience "Kabob-ing" anything. It was fun and a little time consuming prepping and skewering all of the ingredients, but in the end it was definitely worth it. The original recipe called for a reduction made with apricot preserves, the marinade and white wine. I tried to make it as instructed but turned into a nasty smelling I-don't-know-what that never made it onto the skewers. They were wonderful without it so I didn't even include it in what I made below. Happy Kabobing!

Ingredients:
  • 1 cup chopped fresh mint
  • ¾ cup dry white wine
  • 2 Tbsp lemon juice
  • 2 Tbsp honey
  • 3 lb. cubed lamb stew meat
  • 1 lb pearl onions, peeled (or I used a regular sweet onion quartered)
  • 1 Red Bell Pepper - rinsed, de-seeded and cut into 1 square inch pieces
  • 1 Orange Bell Pepper - rinsed, de-seeded and cut into 1 square inch pieces
  • 1 small container Cherry Tomatoes,  rinsed 
  • 8 bamboo skewers, soaked in water for 30 minutes
Directions:

  1. In small bowl combine mint, wine, lemon juice and honey. Stir to combine.
  2. In large bowl toss together lamb, onions, tomatoes, and bell peppers  Add wine mixture and toss until evenly combined. Cover, and refrigerate 4 hours to overnight.
  3. Place lamb, onions  onto bamboo skewers, alternating lamb and onions until ingredients are used. Reserve remaining marinade and set aside.
  4. Grill skewers until lamb is cooked through, about 8 minutes on each side. 


Inspired from: Mint Honey Lamb Skewers


Like what your reading? Share it!

Wednesday, August 8, 2012

Zippy Ground Beef Skillet


This recipe to me is the epitome of what I wish Hamburger Helper would taste like. Granted, I'm happy to say I made this without using any canned produce. The tomatoes have been plentiful on our sole tomato plant this week. It was amazingly fresh and lighter than I was expecting. The sauce didn't thicken after cooling as much as I would have liked, but next time I'll just add a little more cornstarch.

Ingredients:
Tomatoes from my lone tomato plant!
  • 2 cups uncooked small tube pasta 
  • 1 pound lean ground beef 
  • 3/4 cup onion, diced   
  • 3/4 cup green bell pepper, diced   (I actually used Red)
  • 1 (28 ounce) can or 3 1/2 cups diced tomatoes, undrained 
  • 1-2 jalapeno peppers, seeded and minced - wear gloves 
  • 1 tablespoon honey 
  • 2 teaspoons chili powder 
  • 3/4 teaspoon salt (or to taste)
  • 1 1/2 cups reduced fat sour cream
  • 1 tsp cornstarch dissolved in 1 tbsp cold water (for sauce thickening if needed)
Directions:
  1. Start water to boil for pasta.
    Add Tomato
  2. Dice onion, green bell pepper, & jalapeno.
  3. Cook pasta according to package directions. 
  4. Meanwhile, in a large nonstick skillet, cook the beef, onion and green pepper over medium heat until meat is no longer pink; drain. 
  5. Add the tomatoes, jalapenos, honey, chili powder and salt. 
  6. Bring to a simmer then reduce heat to low; cook, uncovered, for 10 minutes, stirring occasionally. 
  7. Drain pasta; add to beef mixture. 
  8. Add sour cream. 
  9. Cook and stir until heated through (do not boil).
After simmering for 10 minutes


Like what your reading? Share it!

Tuesday, August 7, 2012

Jalapeno Garlic Chuck Roast

(Before Cooking)
This recipe I found was originally done as a pork shoulder. I decided to change it up a little bit and use this marinade on a chuck roast instead. Don't be afraid of the jalapeno. It really wasn't spicy at all, just good flavor from the marinade. It turned out pretty tasty.

Ingredients:
  • 2 jalapenos, stem removed
  • 4 cloves garlic
  • 1 1/2 teaspoons Salt-Free/MSG-Free Original Mrs Dash (or original recipe used salt)
  • 2 tablespoons vinegar
  • 1/4 cup olive oil
  • 2.5 pounds boneless chuck roast
  • potatoes and carrots (optional)
Directions: 
  1. Combine jalapenos, garlic, Mrs Dash/salt and vinegar in a food processor or blender. Pulse until jalapenos and garlic are finely diced. Transfer to a large bowl and stir in olive oil.
  2. Use a knife to put shallow cuts all over the chuck roast. Place the roast in a food storage bag with the marinade. Close the bag and squish the marinade around the roast to coat completely. Refrigerate for 6 hours or overnight.
  3. Preheat oven to 300 degrees.
  4. Place the roast in a foil lined roasting pan. Pour the excess marinade over the top. Bake covered 2 to 2 1/2 hours then add potatoes and carrots. Keep an eye on the juice level - you may need to add a cup or so of water to give the vegetables something to cook in. Bake another hour or so or until vegetables and meat are tender. 
Inspired from Life's Ambrosia Jalapeno Garlic Pork Shoulder


Like what your reading? Share it!

Monday, July 23, 2012

Easy Turkey Avocado Wrap

This is a ridiculously easy wrap to make if you are in a hurry or just want to change up your typical turkey sandwich. I remembered after the fact that I should have added some lettuce and tomato - if they would have fit. I got a little carried away piling on the ingredients but it was delicious as is!


Buttermilk Ranch Dry Mix
Ingredients:

  • 1 8 inch tortilla of choice
  • ~ 2oz sliced turkey of choice 
  • 1/2 avocado, sliced
  • 2-3 tbsp grated cheese
  • ~2 tbsp ranch dressing - I reconstituted some of my Buttermilk Ranch Recipe MSG-Free
  • 3 tbsp lettuce, sliced (optional)
  • 1/2 small tomato, diced (optional)
  • salt & pepper to taste (optional)
Directions:

  1. Place wrap between moistened paper towels and microwave on plate for 15-20 seconds. 
  2. Place wrap directly on plate.
  3. Spread ranch onto tortilla
  4. Pile on turkey, cheese, avocado, lettuce, tomato, any other veggies you would like etc. - make sure you leave a border.
  5. Wrap like a pinwheel. Enjoy!


Like what your reading? Share it!

Sunday, July 15, 2012

Beef Enchiladas


Ingredients:


THE SAUCE:
  • 1 "can" of prepared red enchilada sauce
    • I prepared a packet of my Dry Enchilada Mix with 1 cup water and 8 oz low sodium tomato sauce. Heat until sauce thickens.
  • 1 Tablespoon Canola Oil
  • 1 Tablespoon All-purpose Flour
  • 2 cups Chicken Broth 
  • 1/2 teaspoon Ground Black Pepper
  • 2 Tablespoons Chopped Cilantro 
    • I used cilantro I had frozen from a previous recipe - see Freezing Herbs
Enchilada Sauce Reconstitution
THE MEAT:
  • 1-1/2 pound Ground Beef or Chuck (I prefer chuck)
  • 1 whole Medium Vidalia/sweet Onion, Finely Diced
  • 1 can (4 Ounce) Diced Green Chilies
 THE TORTILLAS:
  • 8-10 whole (to 14) Corn or Flour Tortillas (I prefer taco-sized flour)
FOR ASSEMBLAGE:
  • 3 cups Grated Sharp Cheddar Cheese
  • 1/2 cup Chopped Black Olives (optional)
  • 1 cup Chopped Green Onions (optional)
  • Sauce Prep
  • 1/2 cup Chopped Cilantro (optional - sprinkle on after baking)
Preparation Instructions 
  1. Prepare the Dry Enchilada Mix - Follow the reconstitution directions 
  2. In a large saucepan over medium heat, whisk together oil and flour until a paste forms and cook for 1 minute.
  3. Stir in enchilada sauce, chicken broth, cilantro, & pepper. Bring to a boil. 
  4. Reduce heat and simmer 30-45 minutes.
  5. Meanwhile, as you are waiting for the sauce to begin to boil, start on the meat.
  6. Finely dice onion and add to skillet. Add meat to skillet and brown over medium heat.
    Meat Prep
  7. Drain off fat in a large colander and return meat to skillet.
  8. Stir in diced green chilies to meat/onion mixture.
  9. Stir in about 1/2 cup of red sauce to the meat.
  10. Preheat oven to 350 degrees. Lightly grease 9x13" casserole dish.
  11. Assemble tortillas:
    1. Place tortilla on work surface and spoon in 3-4 tbsp of meat mixture.
    2. Cover the beef with a large tablespoon of cheese (&/or optional black olives & green onions), then roll the tortilla up from one side to make a rolled enchilada.
    3. Place the enchilada seam side down in the baking dish. Repeat with the remaining beef, cheese and tortillas. 
    4. You will use about 1 & 1/2 cups of the cheese for the filling and set the remainder aside for topping the enchiladas in the pan. 
    5. Pour the remaining enchilada mixture over the top of all the enchiladas. Sprinkle with remaining cheese.
  12. Bake for 20 to 25 minutes, until the cheese is melted and bubbly and starting to brown on top.
Inspired by The Pioneer Woman's Enchiladas


Like what your reading? Share it!

Friday, April 6, 2012

Onion Soup Chuck Roast


Ingredients:
Dry Onion Soup Mix - MSG-Free
  • 1 packet/4 tbsp dry onion soup mix - see Dry Onion Soup Mix - MSG-Free
  • 3 cloves fresh minced garlic
  • 2 1/2 lbs boneless chuck roast
  • potatoes and carrots
Directions:
  1. Preheat oven to 300 degrees. Line roasting pan with aluminum foil.
  2. Place meat in roasting pan. Sprinkle 1/2 onion soup mix on one side. Rub into meat. Flip meat over and rub in other half of soup mix. 
  3. Follow the same procedure again with the minced garlic.
  4. Bake covered for 2 1/2 hours. Place potatoes and carrots in roaster. Bake for another hour or so or until meat and vegetables are tender.


Like what your reading? Share it!

Monday, March 19, 2012

Guest Post: Beef and Broccoli


     I'm so excited to announce my first guest post. A great friend of mine, Holly, approached me about writing a guest post a few weeks ago and I was curious as to what she would cook for you guys. I like her approach of a quick, easy, & healthy weeknight meal. Everyone enjoy!


     Hello to all the readers of No Utensil Unused! I'm Holly, and I'll be serving up a guest post or two. I'm always looking for recipes that are fresh and tasty for a weeknight. This is one of my favorite meals that is quick and is so much better than take out!

Ingredients:
  • 1/2 - 3/4 lb stir fry beef strips
  • 6 Tablespoons of your favorite soy sauce, divided
  • pinch of ground Ginger
  • 1 Tablespoon cornstarch
  • 1 bag frozen broccoli stir fry vegetables
  • Brown rice (boil in bag, baby!)

Directions:
  1. Place uncooked beef strips in a bowl. Cover with 3-4 tablespoons of the soy sauce and let marinate for 20 minutes.
  2. Cook the rice will the beef is marinating.
  3. After the beef is done marinating, heat a wok or saute pan over medium heat,
  4. Add beef, ginger, 2 tablespoons soy sauce, and cornstarch. Cook uncovered for 3-5 minutes, stirring occasionally.
  5. Add the bag of frozen vegetables, stir the mixture and look uncovered cook for 5 minutes, stirring occasionally. 
  6. Serve over rice.


Like what your reading? Share it!

Thursday, March 15, 2012

Balsamic Honey Pork Roast

Pin It


I had intentions of making pulled pork out of this recipe but it didn't make it that far! It was eaten whole as a pork roast. Don't be afraid to pour off the juice and shred to enjoy it as pulled pork! To be honest, I had trouble tasting the honey part of this recipe. Next time I will probably up the honey to 1/2 cup and go from there. It was still a very tasty roast!

Ingredients
  • ~ 3-pound boneless pork shoulder roast
  • 1 large onion, chopped
  • 1 medium green or red bell pepper, chopped 
  • 1 teaspoon dried thyme, crushed 
  • 1/2 teaspoon dried rosemary, crushed
  • 1 cup balsamic vinegar 
  • 3/4 cup ketchup
  • 1/3 cup packed brown sugar 
  • 1/4 cup honey 
  • 1 tablespoon Worcestershire              
  • 1 tablespoon Dijon-style mustard 
  • 1 clove garlic, minced 
  • 1/2 teaspoon ground black pepper 
  • 1/4 teaspoon Original MSG/Sodium-free Mrs Dash (or salt)
Directions
  1. Preheat oven to 300 degrees. Line large roasting pan with aluminum foil.
  2. Cut pork shoulder into 2-3 inch chunks. 
  3. Place onion, bell pepper & pork in roasting pan. 
  4. Whisk all other ingredients together in a mixing bowl. Pour mixture into roasting pan; mix well, and cover. 
  5. Place in oven, stirring occasionally, for 5 to 8 hours or until the meat is tender (the meat will fall apart and off the bone when done).
  6. Either enjoy as is OR for Pulled Pork:
  7. Pour off excess juice, remove bone, and shred meat with 2 forks.
  8. Now Enjoy!
Inspired from Six Sisters' Stuff: Slow Cooker Balsamic Honey Pulled Pork 
Pin It


Like what your reading? Share it!

Tuesday, February 28, 2012

Spicy Dr Pepper Pork Roast

Pin It


 I'm always looking for another great way to make a roast. I ran across this recipe and both the Dr. Pepper and chipotle peppers peaked my interest. The recipe was originally designed to make shredded pork tacos, but the family was in the mood for roast instead. So, Viola! Time to add potatoes and carrots and leave it chunky. The peppers definitely added a good kick that required a tissue by the end of the meal. So if you have little ones or ones that don't like a lot of spice, I would back down to only 1/2 a can of peppers. If you want to leave the recipe simply as shredded pork, omit the potatoes and carrots and follow the directions on my BBQ Pulled Pork recipe.   

Ingredients
  • ~2 1/2 lbs pork shoulder, bone included
  • 1 can (11 oz) chipotle peppers in Adobo sauce
  • 24 oz (2 cans) original Dr. Pepper - not Diet!
  • 1 large sweet onion, chopped
  • 2 cloves fresh garlic, minced
  • 2 tbsp brown sugar (optional)
  • salt (or Sodium-Free Mrs. Dash) & pepper
  • 1 lb small red potatoes
  • 1 lb baby carrots
Directions
Pin It
  1. Preheat oven to 300 degrees. Line large roasting pan with aluminum foil.
  2. Cut pork shoulder into 2 inch chunks. 
  3. Combine sliced pork (including bone), onion, garlic, Dr. Pepper, chipolte peppers including sauce, brown sugar, salt and pepper in roasting pan; mix well, and cover. 
  4. Place in oven, stirring occasionally. Add the potatoes and carrots after the first 2 hours (to keep them from being too done/soggy). Cook for a total of 3 to 4 hours or until the meat, potatoes, carrots are tender (the meat will fall apart and off the bone when done). 
  5. Enjoy!
Courtesy of The Pioneer Woman's Spicy Dr Pepper Shredded Pork
Pin It


Like what your reading? Share it!

Tuesday, February 7, 2012

Honey Mustard Chicken


Pin It

Ingredients:
  • 5 chicken thighs - original recipe used breasts
  • 3 tablespoons spicy brown mustard
  • 3 tablespoons honey
  • garlic powder, onion powder, salt & pepper to taste
  • 1 - 1 1/2 cup breadcrumbs 
    • The original recipe used panko - I only had roasted garlic regular breadcrumbs & opted to leave out the garlic powder.
Directions:
  1. Preheat oven to 350.
  2. In a shallow dish, combine honey & mustard.
  3. In another shallow dish, place breadcrumbs.
  4. Season chicken with spices to your taste.
  5. Coat chicken with honey mustard mixture.
  6. Dredge chicken in breadcrumbs.
  7. Place chicken on lightly greased baking sheet or casserole dish.
  8. Bake chicken in preheated oven for 30-45 minutes (depending on thickness) or until done.
Optional Sauce Drizzle:

If you notice in the picture that there are 2 different colored sauces over the chicken. This came about because I wanted to have extra sauce on the chicken. I didn't want to use prepared honey mustard so I attempted to make it myself. Well, the first sauce listed below was ok by itself but I really wanted it to be tangier. It came out looking like a light yellow opaque sauce. So I tried again. The second sauce listed below I took from the recipe above. It is the darker, less opaque sauce. Still wasn't super happy with it as a stand alone. So, to keep from wasting both, I drizzled both on top of the chicken and it was an excellent decision! It turned out yummy and just was I wanted!

Sauce #1:
  • 1/4 cup mayonnaise
  • 2 tablespoons prepared yellow mustard
  • 1/2 teaspoon garlic powder
  • 1 1/2 tsp vinegar
  • 2 tablespoons honey
 Sauce #2:
  • 2 tablespoons spicy brown mustard
  • 1 tablespoons honey
Directions:
  1. Mix Sauces in separate bowls. Drizzle over chicken or dip as desired.
Recipe Courtesy of What's Cookin, Chicago? Sauce #1 Inspired from Life's Ambrosia

Pin It


Like what your reading? Share it!

Friday, January 27, 2012

Baked Dijon & Lime Chicken


Pin It
 
This is probably one of my easiest prep, throw in the oven dishes to date! And did I mention it's delicious? Enjoy!
 
Ingredients:
  • 3-4 boneless, skinless chicken breasts, cut into large chunks
  • 3 tbsp Dijon mustard
  • 1 tbsp light mayonnaise
  • 1 clove garlic, crushed
  • 1 lime, zested then juiced 
  • 3/4 tsp pepper
  • salt (optional) 
    • The original recipe added salt after rinsing the chicken. I opted for the lower sodium version and couldn't tell it was missing)
  • dried parsley (original recipe called for parsley but I was out - still turned out great!)
  • cooking spray
Directions:
  1. Preheat oven to 350°. Spray a large casserole dish with cooking spray.
  2. Cut chicken into large chunks (or you can leave them whole. Keep in mind your cooking time will need to be increased to around 45-50 minutes). Rinse the chicken & pat dry. Place chicken in large bowl.
  3. In a small bowl combine Dijon, mayonnaise, lime juice, lime zest, garlic and pepper. Mix well. Pour over chicken, tossing well to coat.
  4. Place chicken in dish as a single layer. Top the chicken with dried parsley. 
  5. Bake until cooked through, about 30-35 minutes. 
  6. Finish the chicken under the broiler until it is golden brown. 
  7. Serve chicken with the pan juices drizzled over the top.
 Courtesy of Gina's Skinny Recipes
Pin It


Like what your reading? Share it!

Monday, January 23, 2012

Crispy Southwestern Wontons


Pin It

Ingredients:
  • 1 tbsp olive oil
  • 1/4 cup diced onion (I used frozen)
  • 1/4 cup diced red bell pepper
  • 1 clove garlic, minced
  • 1/4 cup frozen corn kernels
  • 1/4 cup canned black beans, drained
  • 5 oz (1 cup) chicken, shredded
  • 1/4 tsp pepper
  • 1/2 cup shredded cheddar cheese
  • 2 tbsp (1/2 pkg) dry ranch dressing - see Buttermilk Dry Ranch Dressing Mix for an MSG-free version
  • 24-30 wonton wrappers
  • canola or vegetable oil for frying
 Directions:
  1. Heat olive oil in a large skillet over medium heat. 
  2. Add onions and saute for 5 minutes. 
  3. Add bell pepper and saute for 5 more minutes. 
  4. Add garlic and saute for 1 minute. 
  5. Add corn, beans, and chicken and stir to combine. Remove from heat.
  6. Move the chicken mixture to a bowl and season with pepper, then stir in cheese and dry ranch dressing. 
  7. Begin heating about 1/2 inch of canola or vegetable oil in a large skillet over medium heat. 
  8. Meanwhile, scoop 1 teaspoon of chicken mixture into the center of each wonton wrapper. 
  9. Rub some water on two sides of the wrapper, then fold over to firmly seal, forming a triangle, and gently press out any extra air pockets. 
  10. When the oil is hot (I placed a very small piece of chicken (about the size of a thumbnail) in the oil and waited until it started bubbling good), place 6 wontons at a time into oil. Cook about 1 minute per side until golden and crispy.
Pin It


Like what your reading? Share it!

Friday, January 13, 2012

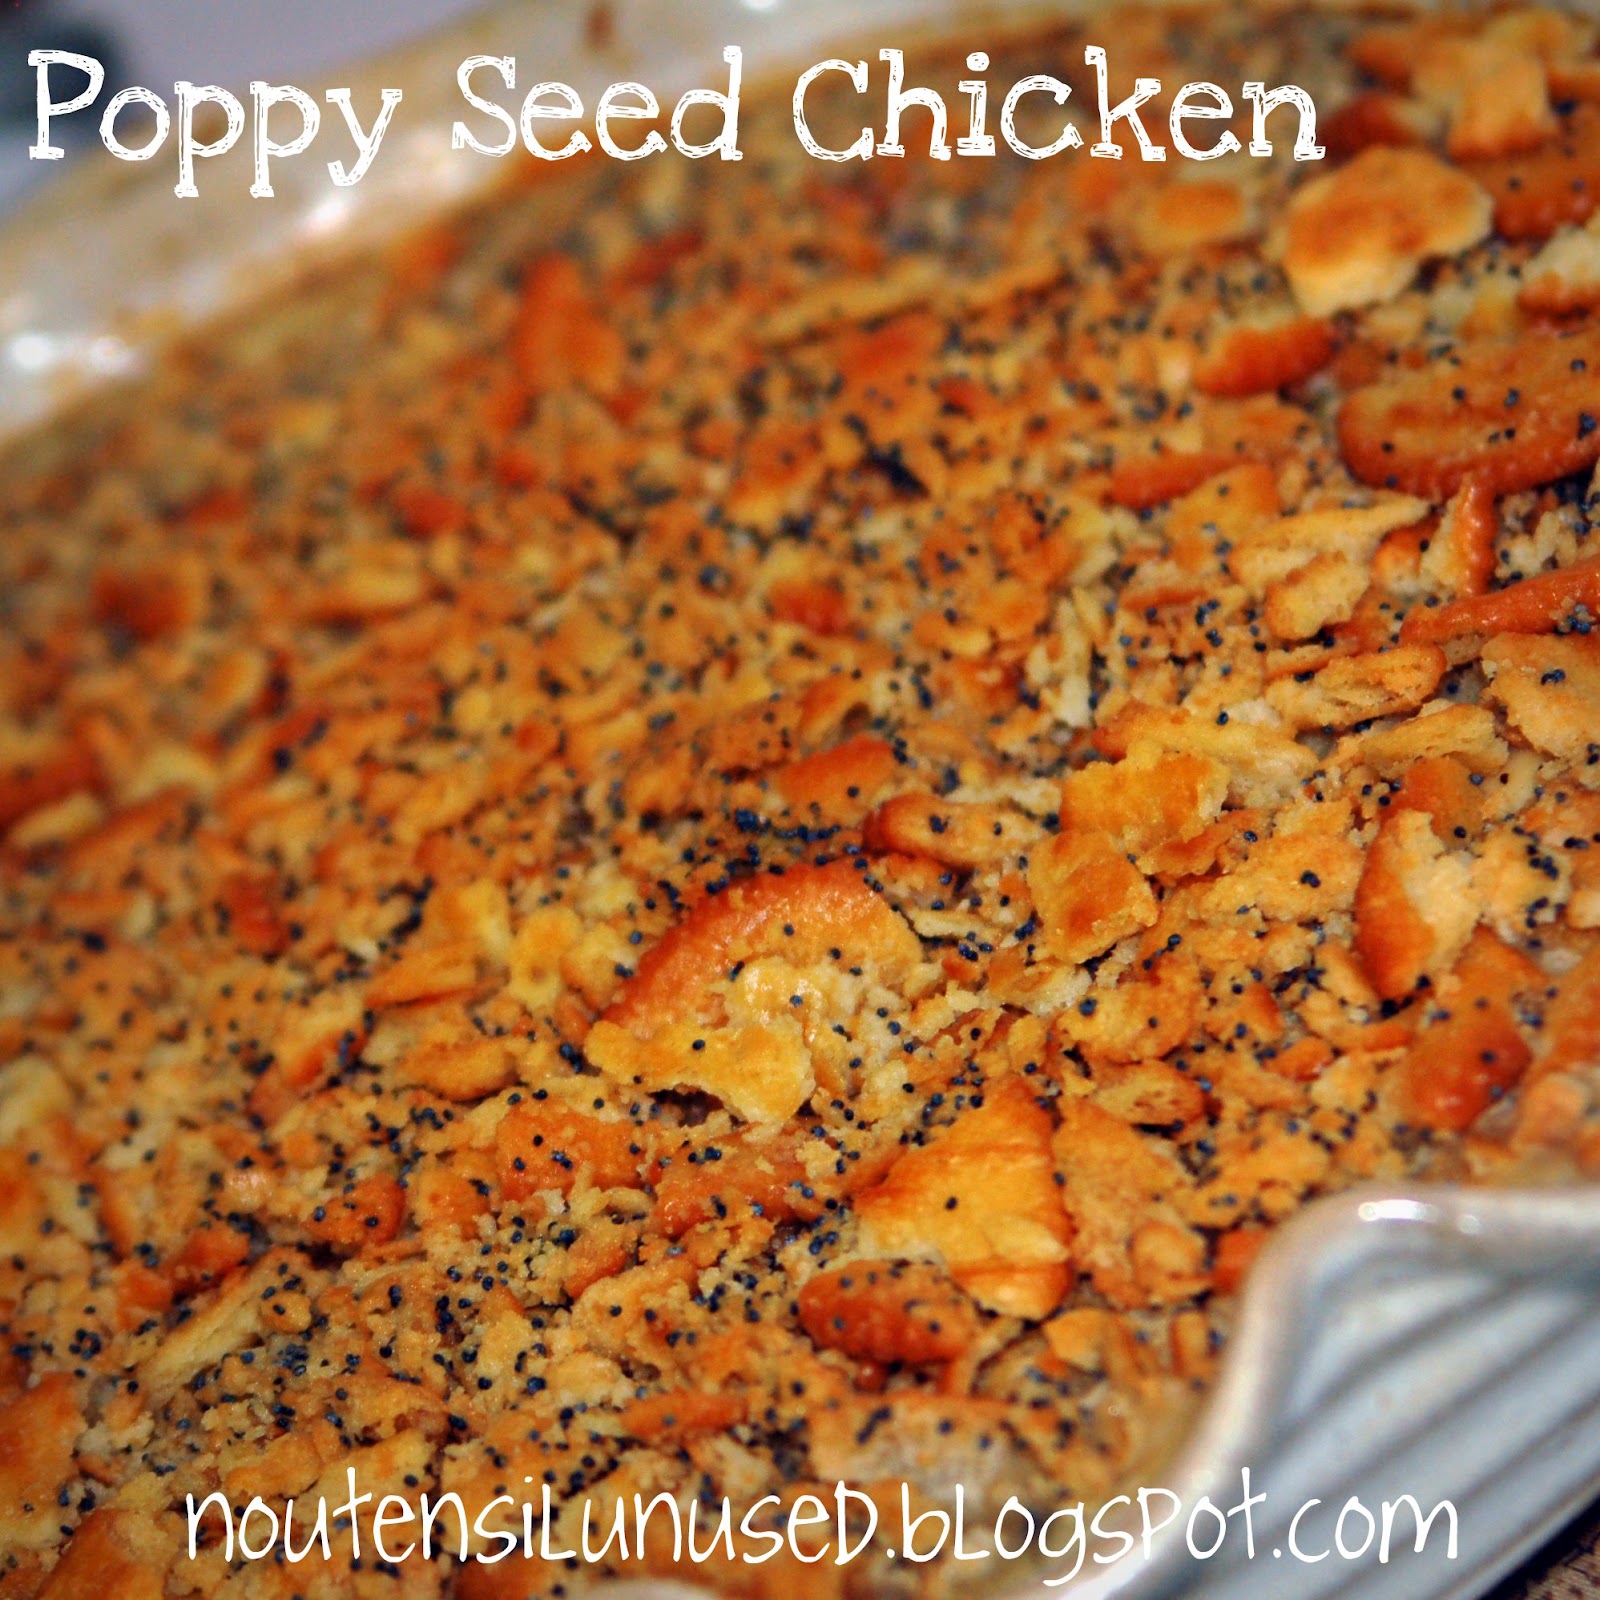
Poppy Seed Chicken


Ingredients:
Cream of Something Soup Pin It
  • 5 cups chicken breasts, cooked and cubed (I used 3 large chicken breasts)
  • 1 cup sour cream
  • 2 can equivalent of Cream of Something Soup
    • The Original recipe calls for 2 cans of condensed cream of chicken soup
    • I substituted the cream of something soup and the recipe turned out wonderfully.
  • 1 tsp Worcestershire sauce
  • 1 tsp celery salt
  • 1 tsp minced garlic
  • 1 Tbsp lemon juice
  • 1/4 tsp pepper
  • 2 cups crushed Ritz crackers (about 1 1/2 rolls of crackers)
  • 1/2 cup melted butter
  • 1 Tbsp poppy seeds
Directions:
  1. Preheat oven to 350 degrees. Spray cooking spray into 9x13" casserole dish.
  2. Cut the raw chicken into cubes and place into casserole dish. Spread just a little olive oil over the top (to keep the chicken from drying out) along with a sprinkling of salt and pepper.
  3. Bake for 20 minutes. Turn chicken over. Bake for another 15-20 minutes until done. It does not have to be browned - just cooked through at this point. Drain juice off of chicken in large colander and place back in casserole dish.  
  4. While the chicken is baking, this gives time to reconstitute the cream of something soup. Click on the link for the recipe.
  5. Stir/whisk together the condensed soup, sour cream, Worcestershire sauce, celery salt, garlic, lemon juice and pepper.
  6. Pour over the cooked chicken.
  7. In a separate bowl, stir together the crushed crackers, poppy seeds and melted butter. Sprinkle over the chicken and sauce.
  8. Bake for 30 minutes in the preheated oven, until the top of the casserole is browned and the sauce is bubbly. Serve plain or over rice. 
(Courtesy of The Girl Who Ate Everything )


Like what your reading? Share it!

Thursday, January 5, 2012

Inside-Out Burgers


Good ole' hamburgers were on the menu last night and I decided to put a delicious twist my aunt introduced me to a few years ago - put the cheese on the inside. If you haven't experienced this before, I so recommend you try this the next time you throw hamburgers on the grill (or pan fry if that's your cup of tea). If it sounds hard to you - trust me it's not.

  1. Season your meat however you like to fix it. I prefer mine mixed with a little minced garlic (about a 1/4 tsp per 1/2 lb of meat) and sweet & spicy steak sauce (about 1 tsp per 1/2 lb of meat).
  2. If you are using a package of ground meat (versus the preformed patties), pull out however much you would consider a patty (normally 1/4-1/2 lb meat). 
  3. Take this and divide it in half. Take the 1st half and form a patty to the diameter you desire for the whole burger (it will be 1/2 the thickness of your finished product). 
  4. Place the cheese and any other goodies you want (bacon, onion, etc.) in the middle of your patty - leave about 1/2 inch border. 
  5. Take the 2nd half of your meat and form a 2nd patty to match. 
  6. Place the 2nd half on top of the 1st half. 
  7. Press the patties together and work the corners together by hand to form a good seal. 
  8. I finish seasoning my meat with either a dusting of seasoned salt and pepper or Mrs Dash and pepper before throwing them on the grill. 
  9. Cook until done - try to keep the flipping to a minimum to decrease the chance of your burger falling apart. 


Like what your reading? Share it!

Friday, December 9, 2011

Beef and Broccoli


Ingredients:
  • 1 pound flank or sirloin, sliced thinly across the grain
  • 1 pound broccoli florets, blanched
  • 2 tbsp sesame oil
  • 2 cloves garlic, minced
  • 1 tsp cornstarch, dissolved in 1 tbsp cold water
  • Beef Marinade:
    • 2 tsp soy sauce
    • 1 tsp Chinese rice wine (or dry sherry)
    • 1/2 tsp cornstarch
    • 1/8 tsp freshly ground black pepper
  • Sauce:
    • 3 tbsp oyster sauce
    • 1 tsp Chinese rice wine (or dry sherry)
    • 1/4 cup soy sauce
    • 1 tbsp brown sugar
Directions:
  1. Make the marinade: Stir together the beef marinade ingredients in a medium bowl. Add the beef slices and stir until coated. Let stand for 10 minutes
  2. Make the sauce: Stir together the sauce ingredients in a small bowl. Set aside. 
  3. Blanch the broccoli: Cook the broccoli in a small pot of boiling, salted water until tender-crisp, about 2 minutes. Drain thoroughly. 
    • If you want to cheat: buy a bag of frozen broccoli florets that steam in the bag. I cooked it in the microwave for only the minimum time per bag instructions.
  4. Heat a large frying pan or wok over medium-high heat until a bead of water sizzles and instantly evaporates upon contact. Add the sesame oil and swirl to coat. Add the beef and immediately spread the strips out all over the surface of the wok or pan in a single layer (preferably not touching). Let the beef fry undisturbed for 1 minute. Flip the beef slices over, add the garlic to the pan and fry for an additional 30 seconds to 1 minute until no longer pink.
  5. Pour in the sauce.
  6. Add the blanched broccoli and bring to a boil.
  7. Pour in the dissolved cornstarch and cook, stirring, until the sauce boils and thickens, 30 seconds.
  8. Serve over rice and enjoy!
Courtesy of Can You Stay For Dinner - Beef and Broccoli


Like what your reading? Share it!

Thursday, December 8, 2011

Glazed Pork Chops


Ingredients:
  • 4 boneless pork chops
  • 1/4 cup brown sugar
  • 1/2 tsp cayenne pepper
  • 1/2 tsp Hungarian paprika
  • 1/2 tsp black pepper
  • 1 tsp McCormick Salt Free/MSG Free Garlic & Herb Seasoning 
    • (original recipe calls for 1/2 tsp garlic powder & 1/2 tsp salt - I didn't have the garlic powder and I really don't like adding salt if at all possible)
Directions:
  1. Preheat oven to 350 degrees. 
  2. In a bowl, mix the brown sugar and spices until well combined.
  3. Rub the brown sugar/spice mix all over both sides of the pork chops. Use all of the spice mix.
  4. Heat 2 Tbsp of olive oil in a skillet over medium/high heat. When the oil is hot, add the pork chops. Cook the pork chops for about 5 minutes on each side or until they are nicely browned.
  5. Transfer chops to a foil-lined pan/casserole dish sized to accommodate the chops. Pour excess juice from the skillet over the chops. Bake in the oven for an additional 5 minutes to ensure they are thoroughly cooked (should be white in the middle).
  6. Remove the chops from the oven and drag each side around in the thick glaze that has formed around the chops in the pan prior to serving.


Like what your reading? Share it!

Friday, December 2, 2011

Coconut Chicken Curry


A New Frontier...

Cooking a curry dish is a first for me. I have always loved eating curry dishes out at restaurants but I have felt a little intimidated to try this at home. For my first attempt at curry, I was thankful this dish came out very tasty. Next time I fix this dish, I will try pork and probably add some spice. It was good and flavorful by itself but I like mine with a little more kick. Enjoy!

Ingredients:
  • 1 – 1.5 lbs cooked, shredded chicken
  • 1 can coconut milk
  • 1 can petite diced tomatoes
  • 1 8oz can tomato sauce
  • 1/2 sweet yellow onion, chopped
  • 2 cloves garlic, minced
  • 1 small bag (abt 1 dozen) red potatoes, chunked
  • 3-4 carrots, sliced
  • 1 can water chestnuts, sliced
  • 3 tablespoons curry powder
  • 1 tablespoon sugar
  • salt to taste
  • rice
Directions:

Chicken Prep:
  • Either Bake chicken at 350 degrees for ~30 minutes (until done). OR Boil chicken 30-45 minutes. OR cheat/save some time and buy a rotisserie chicken at the grocery store.
Vegetable Prep:
  • While the chicken is baking, bring a medium stock pot of water boil for the carrots and potatoes. Add the carrots first since they take a little longer to cook. After about 10 minutes add the potatoes to the pot and continue to boil for about 20-30 minutes (or until potatoes and carrots are tender). Drain vegetables.
Rice Prep:
  • I used jasmine rice to serve under the chicken curry. Follow package directions for whatever serving size you would like to prepare. The package I used suggested using chicken stock and white wine instead of water. This gave it a much richer flavor. I fixed 8 servings of rice which traditionally calls for 3 cups of water. I substituted 2 1/2 cups of chicken stock and 1/2 cup of wine.                                  
Curry Directions:
  1. In a large, deep pot, saute onions and garlic in olive oil until onions are near translucent. 
  2. Add curry powder and shredded chicken, stir until well mixed. cook for another minute.
  3. Add potatoes and carrots. Continue to stir. 
  4. Add coconut milk, tomatoes, and tomato sauce. Keep stirring
  5. Add sugar and salt to taste (mine came out without needing salt). keep stirring until well mixed. I let it cook for another minute.
Serve chicken over a bed of rice and enjoy!

Inspired by Leah’s Coconut Chicken Curry


Like what your reading? Share it!

Thursday, December 1, 2011

Honey Lime Chicken Enchiladas


Ingredients:
  • 1/3 cup honey
  • 1/4 cup lime juice (about 2 large limes)
  • 2 teaspoons chili powder
  • 2 large cloves of garlic, finely minced or 1/2 teaspoon garlic powder
  • 1 lb boneless skinless chicken breasts (about 2 large breasts), cooked and shredded
  • 6 small flour tortillas
  • 2 cups of Mexican cheese blend, shredded 
  • 1 14-oz can of red enchilada sauce (mild or medium, to your taste)
  • 1/2 to 3/4 cup of heavy cream
  • 1 Tablespoon of chopped cilantro, to garnish
 Directions:
  1. Preheat oven to 350 degrees F. 
  2. In a small bowl, whisk thoroughly together honey, lime juice, chili powder and garlic. 
  3. In a medium bowl, pour this mixture over the chicken and cover with plastic wrap. Allow to marinate in the refrigerator for 30 minutes to 1 hour.
  4. The original recipe used a griddle to heat the tortillas. I placed the tortillas between 2 damp paper towels and heated them in the microwave for 45 secornds.
  5. Spray the sides and bottom of a 9x13-inch baking dish lightly with cooking spray. 
  6. In a medium bowl combine the enchilada sauce and the heavy cream. Spread about 1/2 cup of the mixture in the bottom of the oiled baking dish. 
  7. Add about 2 tablespoons of the chicken mixture to the center of each tortilla in a line. 
  8. Cover the chicken with a large tablespoon of cheese, then roll the tortilla up from one side to make a rolled enchilada.
  9. Place the enchilada seam side down in the baking dish. Repeat with the remaining chicken, cheese and tortillas. 
  10. You will use about 1 & 1/2 cups of the cheese for the filling and set the remainder aside for topping the enchiladas in the pan. 
  11. Pour the remaining enchilada mixture over the top of all the enchiladas. Sprinkle with remaining cheese.
  12. Bake the enchiladas for 30 to 35 minutes, until the cheese is melted and bubbly and starting to brown on top.
Inspired by Honey Lime Chicken Enchiladas


Like what your reading? Share it!