Tuesday, February 28, 2012

Spicy Dr Pepper Pork Roast

Pin It


 I'm always looking for another great way to make a roast. I ran across this recipe and both the Dr. Pepper and chipotle peppers peaked my interest. The recipe was originally designed to make shredded pork tacos, but the family was in the mood for roast instead. So, Viola! Time to add potatoes and carrots and leave it chunky. The peppers definitely added a good kick that required a tissue by the end of the meal. So if you have little ones or ones that don't like a lot of spice, I would back down to only 1/2 a can of peppers. If you want to leave the recipe simply as shredded pork, omit the potatoes and carrots and follow the directions on my BBQ Pulled Pork recipe.   

Ingredients
  • ~2 1/2 lbs pork shoulder, bone included
  • 1 can (11 oz) chipotle peppers in Adobo sauce
  • 24 oz (2 cans) original Dr. Pepper - not Diet!
  • 1 large sweet onion, chopped
  • 2 cloves fresh garlic, minced
  • 2 tbsp brown sugar (optional)
  • salt (or Sodium-Free Mrs. Dash) & pepper
  • 1 lb small red potatoes
  • 1 lb baby carrots
Directions
Pin It
  1. Preheat oven to 300 degrees. Line large roasting pan with aluminum foil.
  2. Cut pork shoulder into 2 inch chunks. 
  3. Combine sliced pork (including bone), onion, garlic, Dr. Pepper, chipolte peppers including sauce, brown sugar, salt and pepper in roasting pan; mix well, and cover. 
  4. Place in oven, stirring occasionally. Add the potatoes and carrots after the first 2 hours (to keep them from being too done/soggy). Cook for a total of 3 to 4 hours or until the meat, potatoes, carrots are tender (the meat will fall apart and off the bone when done). 
  5. Enjoy!
Courtesy of The Pioneer Woman's Spicy Dr Pepper Shredded Pork
Pin It


Like what your reading? Share it!

Tuesday, February 21, 2012

Sun-Dried Tomato Zucchini Bake

Pin It


This recipe is my first true experiment for this blog. It is a twist to the Parmesan Squash Bake. I was hoping to incorporate balsamic vinegar into a zucchini casserole/bake and came across a bottle of Ken's dressing that was hanging out in the pantry asking to be used. So I decided to put the balsamic vinegar dream on the back burner for a little while and see how this concoction comes out. I have had great luck in the past with baking meats covered in salad dressing (another topic for another time) and decided to give vegetables with dressing a try. It turned out delicious! I can't wait to experiment with other combinations.

Ingredients
  • 3-4 medium zucchini
  • 1 medium sweet yellow onion, diced
  • 1-2 tbsp olive oil
  • 2 cloves garlic, minced
  • 1/2-1 cup grated Parmesan cheese
  • 1/2-3/4 bottle Ken's Lite Sun-Dried Tomato Salad Dressing
Directions
  1. Preheat oven to 350 degrees F.
  2. In a small pan, heat the olive oil. Pan fry the diced onion until soft and translucent, about 7 minutes. Add in the garlic and fry for another minute or so. Pour the onion mixture into the bottom of a 9x9 baking dish.
  3. Slice the zucchini into thin slices. Layer them into 4 rows across in the dish, over the onions. Slowly drizzle the dressing over the pieces until they are evenly coated.
  4. Bake for 30 minutes, uncovered. Sprinkle the Parmesan over the top of the dish. Bake for another 15-20 minutes, or until the veggies are soft and slightly golden brown.
Pin It


Like what your reading? Share it!

Tuesday, February 14, 2012

Chicken Tortilla Soup


Ingredients:
Homemade Chicken Stock Pin It


  • 9 cups chicken stock
  • 2 chicken breasts - skinless, cooked and shredded
  • 1 cup frozen yellow corn (or 1 can drained)
  • 1 can black beans, drained and rinsed
  • 1 can petite diced tomato
  • 1 can Original Rotel Tomatos with Lime & Cilantro
  • 1/2 yellow/sweet onion, chopped
  • 1/2 cup chopped fresh cilantro
  • 6 cloves garlic, minced
  • 2 tbsp cumin
  • 1 tbsp chili powder
  • 1/2 tsp cayenne pepper (optional depending on how spicy you like it)
  • 1-2 limes, juiced
  • 1 cup rice
  • 1 1/2 cups water
  • salt (if desired) and pepper to taste
  • Garnish:
    • Avocado
    • Mexican cheese
    • Tortilla chips
Directions:
  1.  Make Chicken stock
    • Simmering on stove
    • You can either make this from scratch if you have the time (see my recipe for Chicken Stock Here) or buy pre-made stock. 
  2. Cook Chicken, cool, then shred with forks.
    • If you are buying raw chicken, boil chicken covered in water for 30-60 minutes until done.  If you are going to do this, you may as well make your own stock. See above.
    • To save time, you can use either canned chicken or precooked chicken found in the deli case, or pick up a rotisserie chicken (tastes the best) from the deli at your grocery store.
  3. In a large stock pot, combine stock, chicken, corn, black beans, tomato, Rotel, onion, garlic, lime juice, cumin, chili powder, cayenne (optional), salt & pepper. 
  4. Bring to a boil then let simmer for 30-45 minutes (until the onions are almost tender).
  5. Add cilantro, rice and water (the rice will absorb water/broth) and continue to cook for another 20-30 minutes, until rice is done. 
  6. Serve garnished with avocado, cheese and tortilla chips. Enjoy! 
Finished product!
Inspired from Chicken Tortilla Soup II on Allrecipes.com and Six Can Tortilla Soup on Allrecipes.com
Pin It


Like what your reading? Share it!

Sunday, February 12, 2012

Homemade Chicken Stock

Pin It


So easy, and so much more healthy than store bought! The only thing it takes is time!
 
Ingredients:
  • 2 bone-in, skins on, "fryer" chicken breasts
  • stock pot full of Water (I use a 7 QT pot)
  • 1/2 large onion
  • 3 stalks celery
  • 3 carrots, cut into 2 inch pieces
  • 3 garlic cloves, halved
  • 1 bay leaf
  • 1 tsp grated fresh ginger
  • 1 tsp whole peppercorns 
  • salt to taste (the less you use, the lower the sodium!)
Stock strained through a coffee filter Pin It 
Directions:
  1. Place all ingredients into large stock pot.
  2. Bring to a boil, cover and let simmer for at least 2 hours or longer if you have the time. 
  3. Remove from heat.
  4. Retrieve the meat with large fork/spoon and reserve to use for soups, chicken salad, etc.
  5. Obtain another large stock pot/container and fine strainer/colander. Place strainer/colander into the 2nd stock pot/container. Slowly pour stock through colander( you may want to use a large measuring cup to scoop stock out of original pot) to strain the vegetables/spices out. Careful! It will be hot!
  6. To separate the fat:
    1. Either store the stock in refrigerator and let the fat separate out naturally. Skim the fat off the top once cooled OR
    2. Place coffee filter in strainer and slowly pour stock through, leaving the majority of fat in the coffee filter. I had to change the filter for every 2 cups that I poured through.  
  7. Keep refrigerated to use within the next day or two or freeze what you don't need immediately. I placed mine in 1 cup intervals into containers for the freezer. The next day, I removed from the stock from the containers and placed in vacuum bags for future use. Saves space in the freezer by placing into bags.
  8. My batch yielded 14 cups of stock.
Recipe adapted from Chicken Stock by Margaret Price at Allrecipes
Pin It


Like what your reading? Share it!

Tuesday, February 7, 2012

Honey Mustard Chicken


Pin It

Ingredients:
  • 5 chicken thighs - original recipe used breasts
  • 3 tablespoons spicy brown mustard
  • 3 tablespoons honey
  • garlic powder, onion powder, salt & pepper to taste
  • 1 - 1 1/2 cup breadcrumbs 
    • The original recipe used panko - I only had roasted garlic regular breadcrumbs & opted to leave out the garlic powder.
Directions:
  1. Preheat oven to 350.
  2. In a shallow dish, combine honey & mustard.
  3. In another shallow dish, place breadcrumbs.
  4. Season chicken with spices to your taste.
  5. Coat chicken with honey mustard mixture.
  6. Dredge chicken in breadcrumbs.
  7. Place chicken on lightly greased baking sheet or casserole dish.
  8. Bake chicken in preheated oven for 30-45 minutes (depending on thickness) or until done.
Optional Sauce Drizzle:

If you notice in the picture that there are 2 different colored sauces over the chicken. This came about because I wanted to have extra sauce on the chicken. I didn't want to use prepared honey mustard so I attempted to make it myself. Well, the first sauce listed below was ok by itself but I really wanted it to be tangier. It came out looking like a light yellow opaque sauce. So I tried again. The second sauce listed below I took from the recipe above. It is the darker, less opaque sauce. Still wasn't super happy with it as a stand alone. So, to keep from wasting both, I drizzled both on top of the chicken and it was an excellent decision! It turned out yummy and just was I wanted!

Sauce #1:
  • 1/4 cup mayonnaise
  • 2 tablespoons prepared yellow mustard
  • 1/2 teaspoon garlic powder
  • 1 1/2 tsp vinegar
  • 2 tablespoons honey
 Sauce #2:
  • 2 tablespoons spicy brown mustard
  • 1 tablespoons honey
Directions:
  1. Mix Sauces in separate bowls. Drizzle over chicken or dip as desired.
Recipe Courtesy of What's Cookin, Chicago? Sauce #1 Inspired from Life's Ambrosia

Pin It


Like what your reading? Share it!

Friday, January 27, 2012

Baked Dijon & Lime Chicken


Pin It
 
This is probably one of my easiest prep, throw in the oven dishes to date! And did I mention it's delicious? Enjoy!
 
Ingredients:
  • 3-4 boneless, skinless chicken breasts, cut into large chunks
  • 3 tbsp Dijon mustard
  • 1 tbsp light mayonnaise
  • 1 clove garlic, crushed
  • 1 lime, zested then juiced 
  • 3/4 tsp pepper
  • salt (optional) 
    • The original recipe added salt after rinsing the chicken. I opted for the lower sodium version and couldn't tell it was missing)
  • dried parsley (original recipe called for parsley but I was out - still turned out great!)
  • cooking spray
Directions:
  1. Preheat oven to 350°. Spray a large casserole dish with cooking spray.
  2. Cut chicken into large chunks (or you can leave them whole. Keep in mind your cooking time will need to be increased to around 45-50 minutes). Rinse the chicken & pat dry. Place chicken in large bowl.
  3. In a small bowl combine Dijon, mayonnaise, lime juice, lime zest, garlic and pepper. Mix well. Pour over chicken, tossing well to coat.
  4. Place chicken in dish as a single layer. Top the chicken with dried parsley. 
  5. Bake until cooked through, about 30-35 minutes. 
  6. Finish the chicken under the broiler until it is golden brown. 
  7. Serve chicken with the pan juices drizzled over the top.
 Courtesy of Gina's Skinny Recipes
Pin It


Like what your reading? Share it!

Monday, January 23, 2012

Crispy Southwestern Wontons


Pin It

Ingredients:
  • 1 tbsp olive oil
  • 1/4 cup diced onion (I used frozen)
  • 1/4 cup diced red bell pepper
  • 1 clove garlic, minced
  • 1/4 cup frozen corn kernels
  • 1/4 cup canned black beans, drained
  • 5 oz (1 cup) chicken, shredded
  • 1/4 tsp pepper
  • 1/2 cup shredded cheddar cheese
  • 2 tbsp (1/2 pkg) dry ranch dressing - see Buttermilk Dry Ranch Dressing Mix for an MSG-free version
  • 24-30 wonton wrappers
  • canola or vegetable oil for frying
 Directions:
  1. Heat olive oil in a large skillet over medium heat. 
  2. Add onions and saute for 5 minutes. 
  3. Add bell pepper and saute for 5 more minutes. 
  4. Add garlic and saute for 1 minute. 
  5. Add corn, beans, and chicken and stir to combine. Remove from heat.
  6. Move the chicken mixture to a bowl and season with pepper, then stir in cheese and dry ranch dressing. 
  7. Begin heating about 1/2 inch of canola or vegetable oil in a large skillet over medium heat. 
  8. Meanwhile, scoop 1 teaspoon of chicken mixture into the center of each wonton wrapper. 
  9. Rub some water on two sides of the wrapper, then fold over to firmly seal, forming a triangle, and gently press out any extra air pockets. 
  10. When the oil is hot (I placed a very small piece of chicken (about the size of a thumbnail) in the oil and waited until it started bubbling good), place 6 wontons at a time into oil. Cook about 1 minute per side until golden and crispy.
Pin It


Like what your reading? Share it!

Thursday, January 19, 2012

Buttermilk Ranch Dry Mix - MSG-Free

 Ingredients:
  • 1/4 cup dry buttermilk powder (found on the baking aisle with the dry milk)
  • 2 tablespoons dried minced onion
  • 2 tablespoons dried parsley
  • 1 tablespoon dried chives
  • 1/4 teaspoon salt, or to taste
  • 1 teaspoon garlic powder
  • 1 teaspoon dried celery flakes
  • 1/4 teaspoon white pepper
  • 1/4 teaspoon paprika
  • 1/4 teaspoon dried dill weed

Directions:

  1. Mix the buttermilk powder, dried onion, parsley, chives, salt, garlic powder, dried celery flakes, white pepper, paprika, and dill together, and store in a cool, dry place. For a finer texture, place ingredients in a blender and pulse several times.
  2. There are a couple different ways to make the dressing: YOU DECIDE:
    • Whisk together in a mixing bowl with 2 cups of mayonnaise and 2 cups of milk until smooth. 
    OR 
    • 1/4 cup nonfat plain or Greek yogurt, 1/4 cup light mayo and 1/4 cup skim milk per 2 Tbsp dry mix 
    OR
    • 1/4 cup sour cream, 1/4 cup low-fat milk, and 1/4 cup light mayo per 2 Tbsp dry mix
  3. Store in the fridge.
(Courtesy of: Dry Buttermilk Ranch Mix by Scotdog)


Like what your reading? Share it!

Wednesday, January 18, 2012

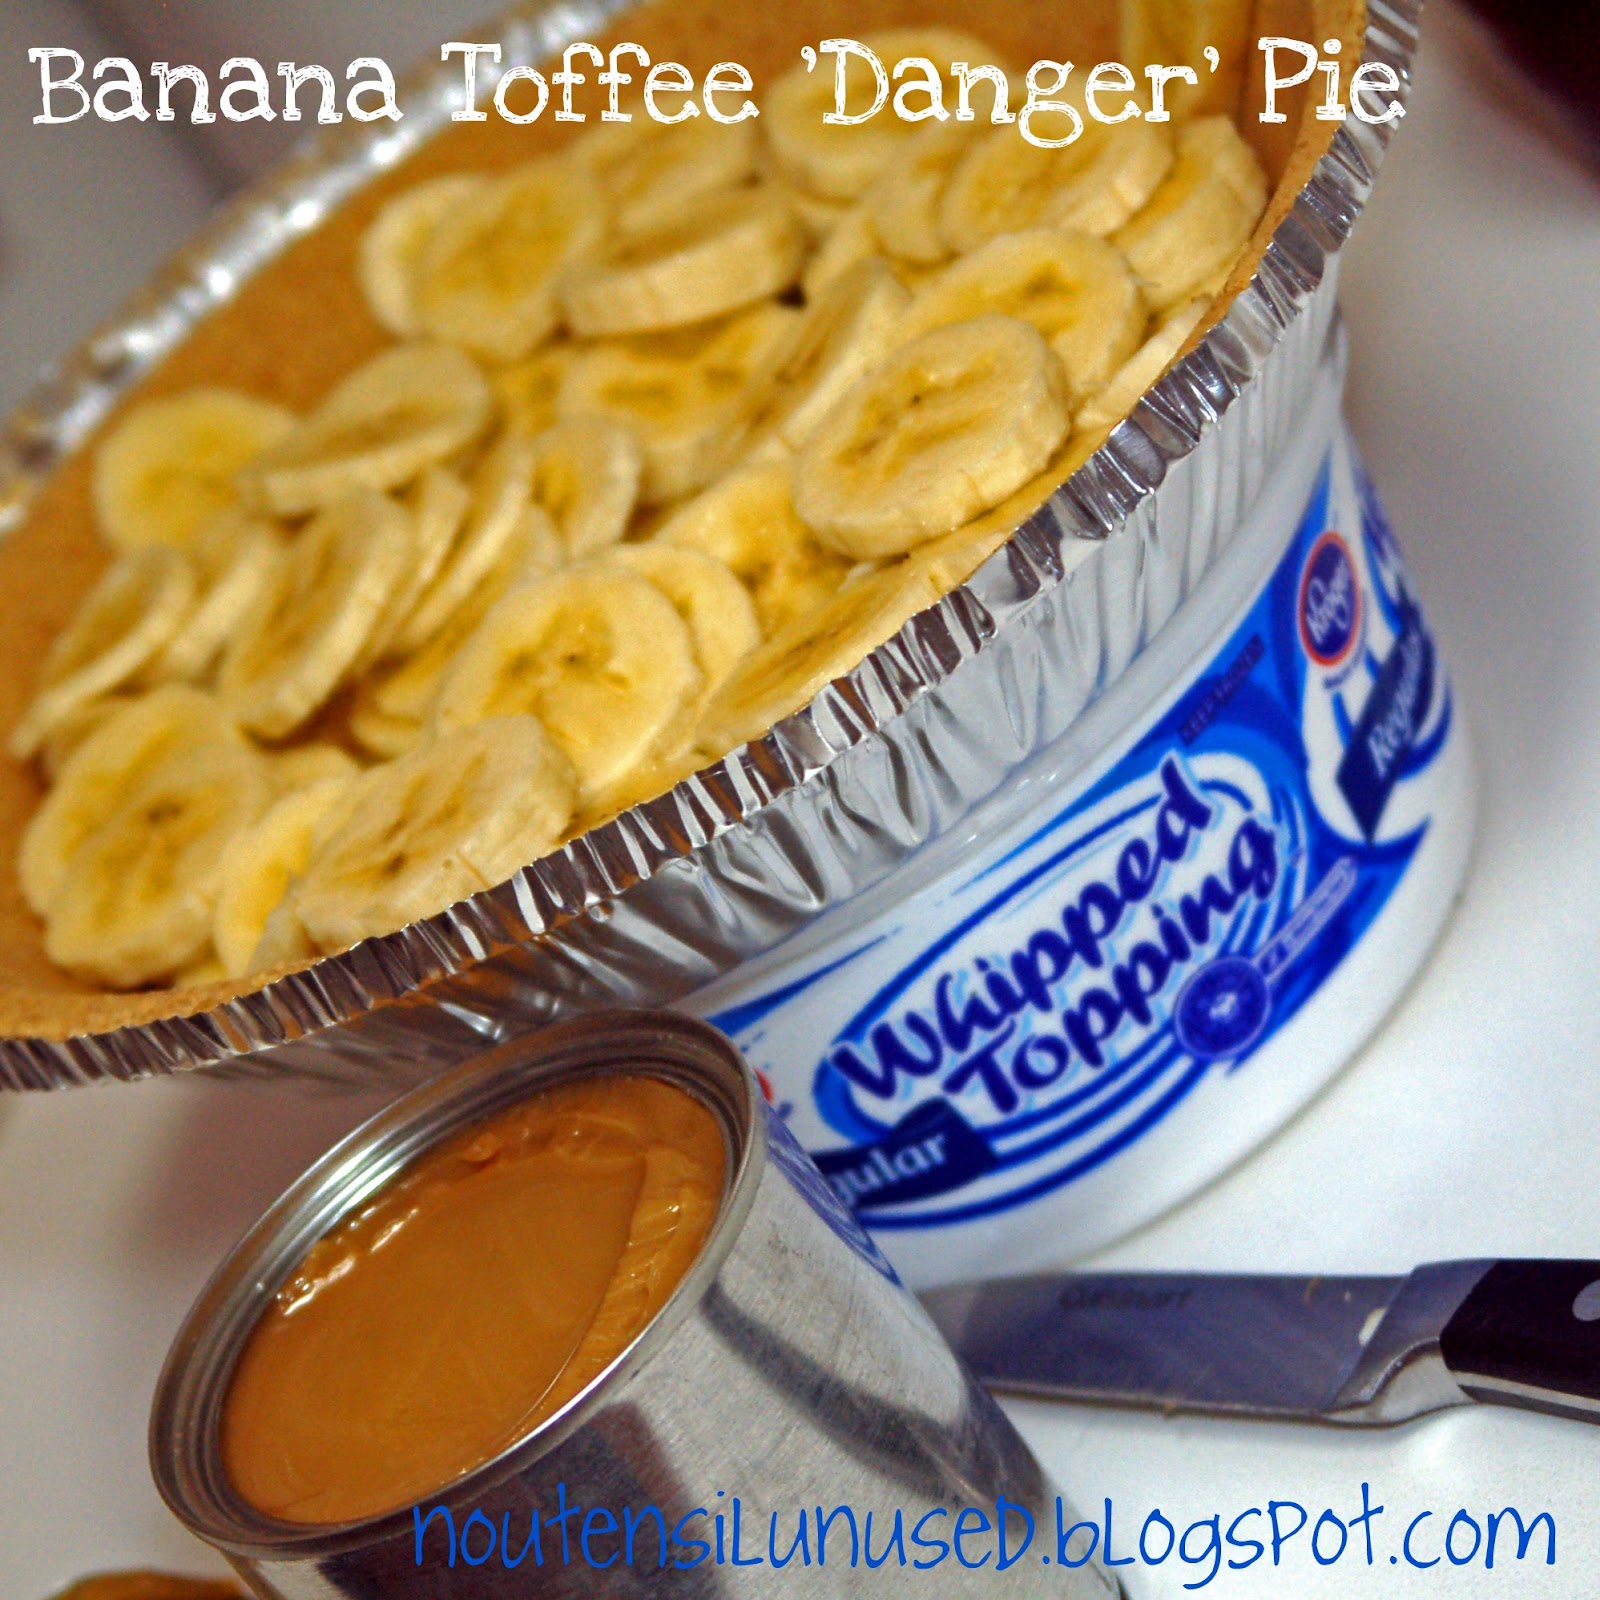
Banana Toffee Danger Pie


When I first saw this recipe on pinterest, I thought I have found the ultimate combination for a pie. This pie combines some of my all-time favorite ingredients: toffee, banana, and whipped topping (aka Cool Whip). Being from the South, this pie had never crossed my radar before. Apparently, this pie is more popular up North and overseas - the southern equivalent, I think, is Banana Cream Pie. This is no Banana Cream Pie though.

Now you may be wondering what is the "danger" part of this pie. There actually is a dangerous element to this recipe besides its yummy goodness. Turning the sweetened condensed milk into toffee can be very dangerous if left unsupervised. To make the toffee, place a can of sweetened condensed milk into a large/tall pot of boiling water and let it boil for 2 1/2 hours. If you have any clue about how water goes through it's different phases (ice vs liquid vs vapor), water, by nature, will evaporate as it boils. If the can becomes uncovered in the boiling water, it will EXPLODE. No joke. I read comments on other posts about how people would leave their house while this was cooking (and I don't know why someone to leave a boiling pot of water on the stove and not be at home - that is beyond my comprehension) and come back to a gooey mess requiring kitchen makeovers (i.e. ruined cabinets and repainting walls). So PLEASE heed my warning: DO NOT, UNDER ANY CIRCUMSTANCE, LEAVE THIS UNATTENDED. It's not worth it. I set my kitchen timer to go off every 20 minutes to remind me to go check on it just to make sure. I did have to add water on more than one occasion.

Depending on how "homemade" you want to make this pie will depend on the ingredients needed. I confess, I didn't make a homemade graham crust or the homemade whipped topping - I used the pre-made. Here are the ways to make it from scratch:

Homemade Graham Crust:
  • Refer to my Eggnog Cheesecake Bar recipe and follow steps 1-3. 
  • Use a pie pan instead (and no aluminum foil like I used in that recipe)
  • Bake about 10 minutes, until it is just slightly brown around the edges. Watch it so it won't burn!
  • Let cool before use.
Homemade Whipped Topping:
  • I have read that freezing a large mixing bowl and beaters for about 10 minutes prior to making is a good idea. 
  • Using electric mixer, whip 2 cups whipping cream (heavy cream) until peaks are about to form.
  • Add 2 tsp of vanilla and 2 tbsp confectioner's sugar and beat until stiff peaks form.
  • (Courtesy of Paula from Allrecipes)
Now onto the main show...
Ingredients:
  • 3 bananas
  • 1 tin of sweetened condensed milk
  • 2 cups whipped topping, thawed
  • 1 graham cracker crust
  • 1 small bar of chocolate (optional for garnish)

Directions:
  • Warning: Danger!

    Bring large/tall stock pot of water to boil. Remove the label from the sweetened condensed milk. Place unopened can in boiling water, completely submerged. Cover and boil for 2 1/2 hours. KEEP CAN COVERED and SUBMERGED IN WATER AT ALL TIMES!!!! (see above for details) **This step can be done hours to days to months ahead of time. I went ahead and prepped 2 cans since I was going through the trouble of watching a pot for 2 1/2 hours.

  • Your Toffee
    Take the pot off the stove and allow the can to cool. This will take some time. Don't expect it to cool in 30 minutes - you can place it in the refrigerator or freezer if you need it in the more immediate future. 


  • Once the can has cooled you can start the rest of the pie prep. 
  • Make the crust and whipped topping if you are making from scratch.
  • Bananas Sliced
    Slice bananas and place into pie crust. 


  • Open toffee can and stir with a knife until smooth.
  • Toffee Spread
    Pour toffee onto bananas and smooth.


  • Final Product
    Spread whipped topping over pie.


  • Grate chocolate over top for garnish (optional).
  • Cool in refrigerator for at least one hour to set.
(Courtesy of Brooklyn Limestone's Banoffee "Danger" Pie)


Like what your reading? Share it!

Friday, January 13, 2012

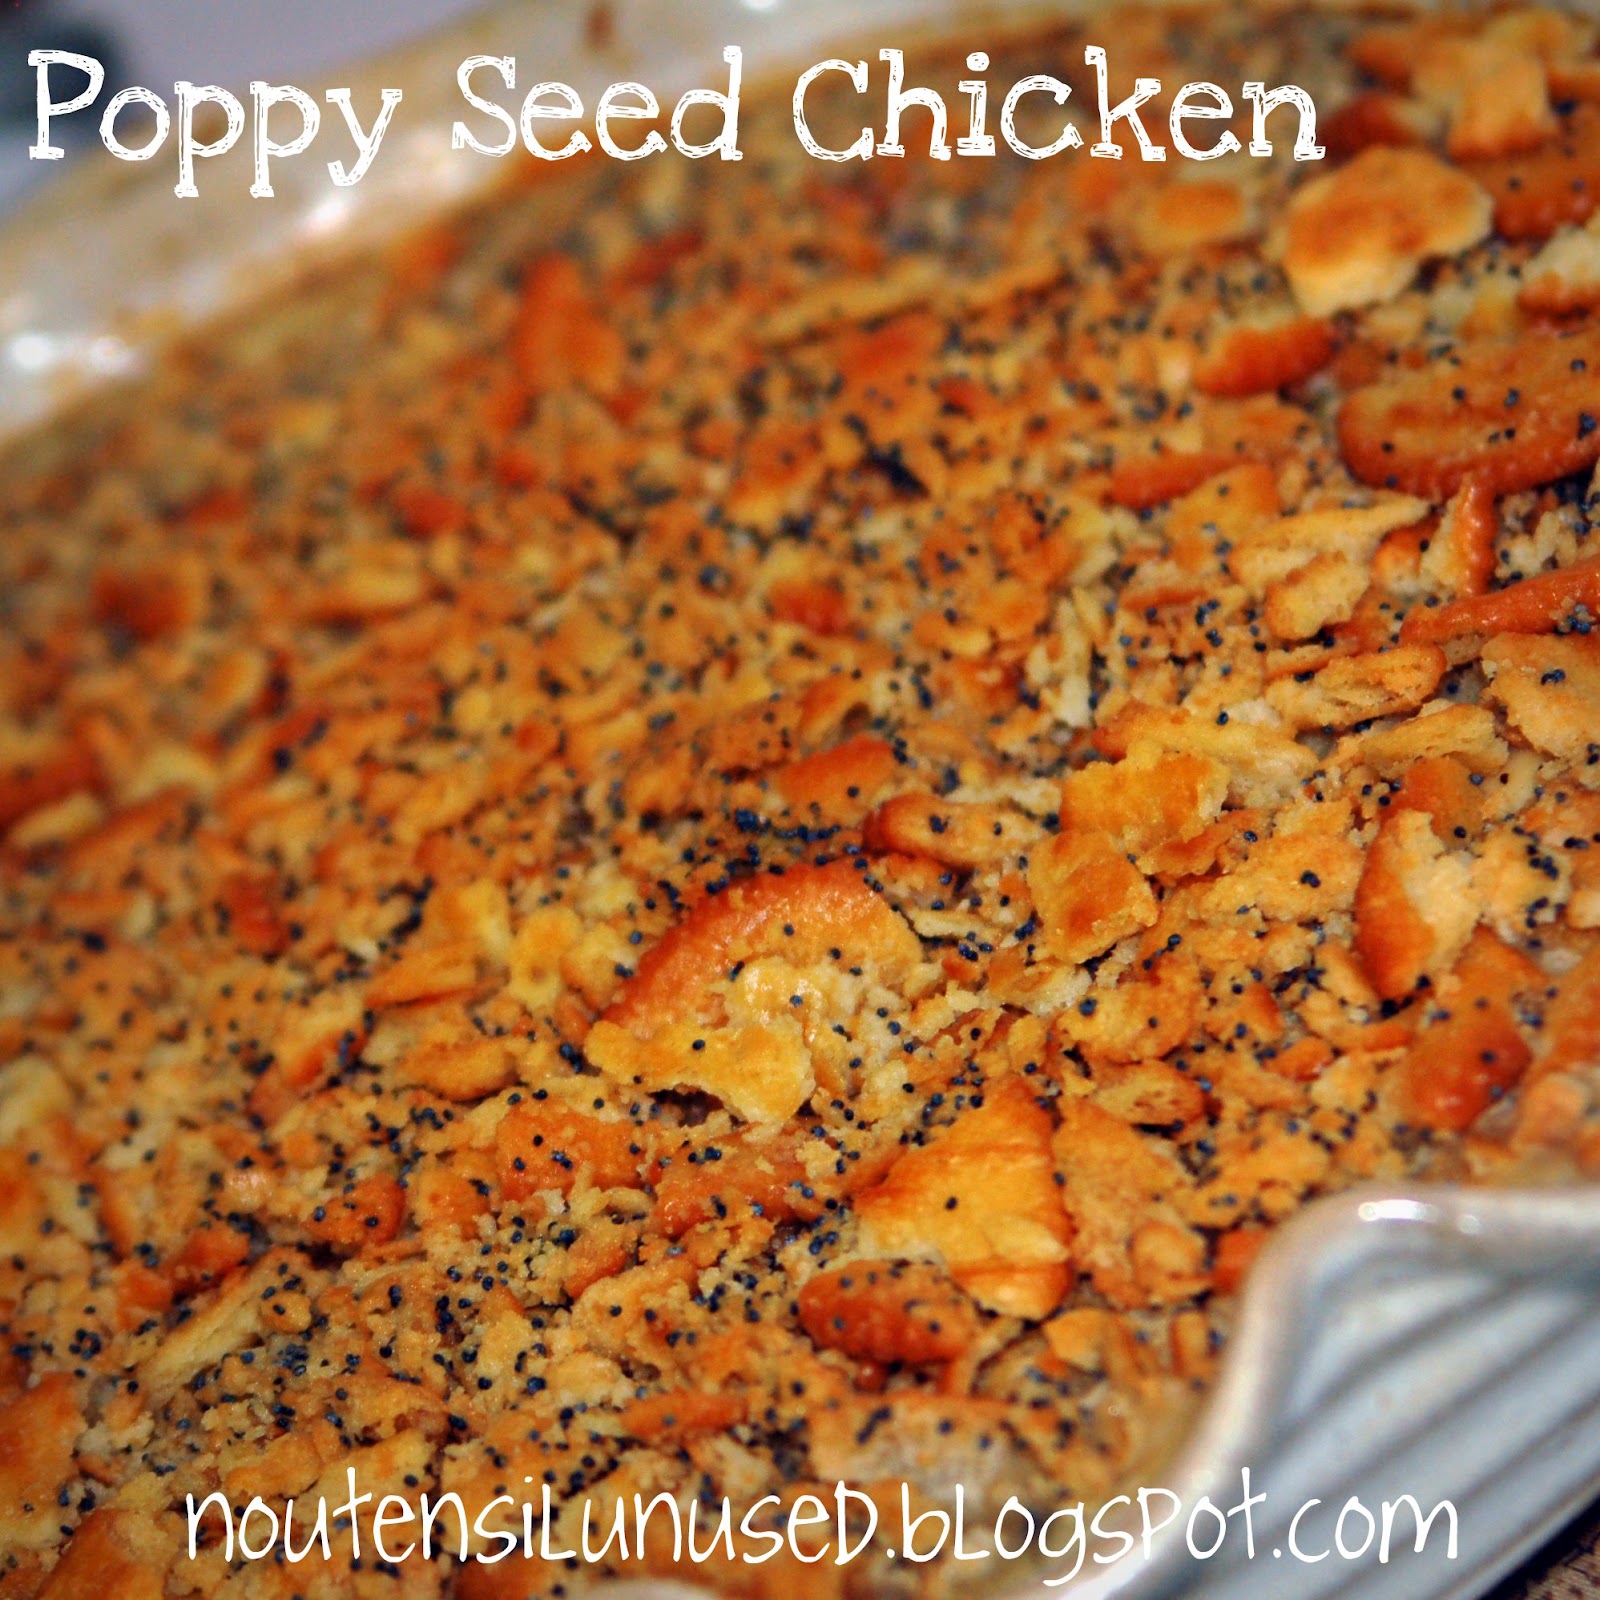
Poppy Seed Chicken


Ingredients:
Cream of Something Soup Pin It
  • 5 cups chicken breasts, cooked and cubed (I used 3 large chicken breasts)
  • 1 cup sour cream
  • 2 can equivalent of Cream of Something Soup
    • The Original recipe calls for 2 cans of condensed cream of chicken soup
    • I substituted the cream of something soup and the recipe turned out wonderfully.
  • 1 tsp Worcestershire sauce
  • 1 tsp celery salt
  • 1 tsp minced garlic
  • 1 Tbsp lemon juice
  • 1/4 tsp pepper
  • 2 cups crushed Ritz crackers (about 1 1/2 rolls of crackers)
  • 1/2 cup melted butter
  • 1 Tbsp poppy seeds
Directions:
  1. Preheat oven to 350 degrees. Spray cooking spray into 9x13" casserole dish.
  2. Cut the raw chicken into cubes and place into casserole dish. Spread just a little olive oil over the top (to keep the chicken from drying out) along with a sprinkling of salt and pepper.
  3. Bake for 20 minutes. Turn chicken over. Bake for another 15-20 minutes until done. It does not have to be browned - just cooked through at this point. Drain juice off of chicken in large colander and place back in casserole dish.  
  4. While the chicken is baking, this gives time to reconstitute the cream of something soup. Click on the link for the recipe.
  5. Stir/whisk together the condensed soup, sour cream, Worcestershire sauce, celery salt, garlic, lemon juice and pepper.
  6. Pour over the cooked chicken.
  7. In a separate bowl, stir together the crushed crackers, poppy seeds and melted butter. Sprinkle over the chicken and sauce.
  8. Bake for 30 minutes in the preheated oven, until the top of the casserole is browned and the sauce is bubbly. Serve plain or over rice. 
(Courtesy of The Girl Who Ate Everything )


Like what your reading? Share it!